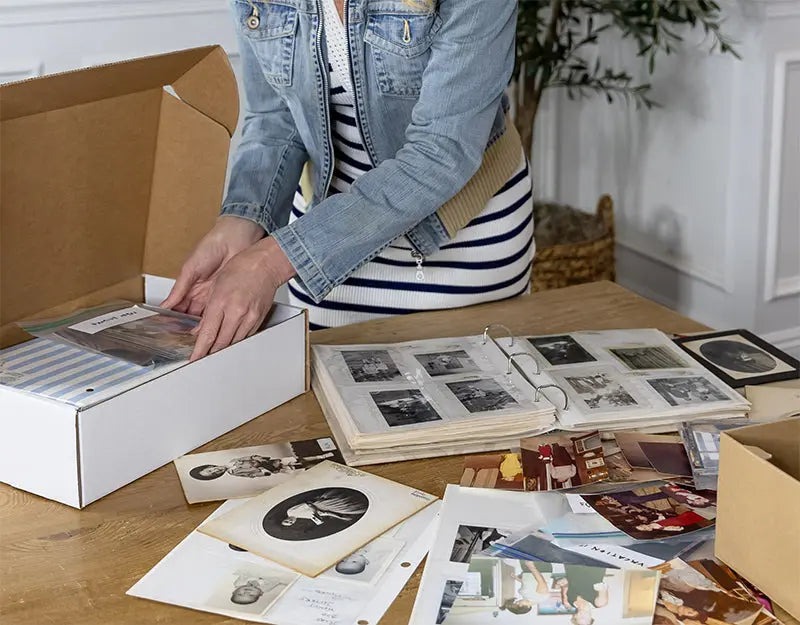
Fading family photos trapped inside "sticky" magnetic albums are heartbreaking—they represent a modern family crisis that rarely gets the attention it deserves. For decades, we meticulously curated these books, only to realize that the very adhesive intended to preserve them is now slowly destroying the paper, while the act of peeling them out risks tearing a hole through a piece of history. It creates a paralyzing dilemma: do you leave the photos to deteriorate, or do you risk damaging them in an attempt to save them?
The good news is that by 2026, the technology has caught up to our nostalgia. The safest way to digitize scrapbooks without removing photos is to use an overhead scanner like the CZUR ET24 Pro or a professional white-glove service like Photokive. These methods prioritize "non-destructive" scanning, meaning the physical layout, handwritten captions, and delicate bindings of your albums remain entirely intact while capturing high-resolution digital copies that will last for generations.
Method 1: The DIY Approach with Overhead Scanners
For the "Family Archivist" who wants total control over the process and has a significant library of albums to process, the overhead scanner is a revolutionary tool. Unlike traditional flatbed scanners that require you to press the book face-down—often putting immense strain on the spine—overhead scanners use a "downward-facing" sensor mounted on a neck, much like a desk lamp.
The real magic, however, isn't just in the camera; it's in the software. Modern overhead scanners like the CZUR ET24 Pro or the ET16 Plus use laser-based "curve flattening" technology. As you turn the pages, the scanner calculates the three-dimensional curve of the book's gutter and digitally straightens the image. It even recognizes the yellow "finger cots" used to hold pages down, automatically removing them from the final scan.
The efficiency of this hardware is staggering. In testing, the CZUR ET16 Plus can process a 32-page document or album in 4 minutes and 39 seconds, averaging approximately 8.6 seconds per page. For a family with twenty thick scrapbooks, this speed turns a multi-month project into a productive weekend.
Expert Tip: When scanning DIY, use a foot pedal (usually included with high-end overhead scanners). This keeps both hands free to turn pages and smooth out wrinkles, significantly reducing the "labor fatigue" common in large digitization projects.
Method 2: Professional White-Glove Digitization Services
While DIY is cost-effective for large volumes, some heirlooms are simply too fragile or too important to handle yourself. This is where the "White-Glove Treatment" comes in. There is a fundamental difference between bulk digitization and archival preservation.
Services like ScanMyPhotos are excellent for large boxes of loose, sturdy 4x6 prints. However, for intact scrapbooks, you need a specialized service like Photokive. Unlike bulk processors that often require you to dismantle albums to feed them through high-speed rollers, Photokive uses professional-grade overhead capture stations.
Professional scrapbook digitization typically costs between $0.48 and $0.99 per photo for high-end services. Photokive, for example, charges a starting rate of $59 for the first 100 photos (approximately $0.59 each). This premium price justifies the manual labor involved: every page is handled by a photographer who performs manual blemish removal and color correction to reverse the yellowing effects of old adhesive.
Perhaps the most compelling reason to go professional in 2026 is the security. Photokive offers a "disaster guarantee" that covers free reprints or digital restoration if your original albums are ever lost to wildfires, floods, or other natural disasters after they've been scanned—a level of protection DIY simply cannot match.
DIY vs. Professional: Which is Right for You?
The choice between doing it yourself and hiring a pro often comes down to the "Convenience vs. Volume" metric. If you have a single, priceless wedding album from 1950, a professional service is the logical choice. If you have a shelf full of childhood scrapbooks from the 90s, investing in hardware makes more sense.
| Feature | DIY (Overhead Scanner) | Professional Service (Photokive) |
|---|---|---|
| Upfront Cost | $400 - $600 (Hardware) | $59+ (Per Project) |
| Price per Image | $0.00 (After hardware) | $0.48 - $0.99 |
| Time Investment | High (Manually turning pages) | Low (Just shipping/drop-off) |
| Safety Level | High (Non-destructive) | Ultra-High (Expert handling) |
| Speed | ~8.6 seconds per page | 2–4 Week Turnaround |
| Best For | Massive libraries/Ongoing projects | Irreplaceable, fragile heirlooms |
Technical Specs for Archival Success
Whether you are scanning at home or vetting a service, the technical specifications will dictate whether your digital files are "good enough for social media" or "archival quality."
- Resolution (DPI): 300 DPI (Dots Per Inch) is the industry standard for archival quality, allowing you to reprint the photo at its original size. However, if you plan to enlarge a small polaroid into a 8x10 frame, you should aim for 600+ DPI.
- File Formats: For sharing on smartphones, JPEGs are fine. But for preservation, request TIFF files. TIFFs are "lossless," meaning they don't lose quality every time you open or save them.
- Lighting: Glare is the enemy of the scrapbook. Because many old photos have a glossy finish or are covered by plastic protectors, side-lighting (polarized lighting) is essential. Overhead scanners like the ET24 Pro include side lights specifically to prevent the "white-out" effect on glossy surfaces.
Step-by-Step Workflow for DIY Scanning
If you’ve decided to take the DIY route, following a structured workflow ensures you don't end up with a digital mess of unnamed files.
- Prepare the Space: Use a black, non-reflective mat as your scanning surface. This helps the software identify the edges of the page more accurately.
- Clean the Surfaces: Use a microfiber cloth to gently wipe the scanner lens and the album pages. Avoid chemical cleaners which can off-gas and damage the photos over time.
- The Scanning Rhythm: Use the foot pedal. Place the book, press the pedal, turn the page, and repeat. Do not worry about the curve of the page; let the software do the heavy lifting.
- Organization on the Fly: Name your folders as you go (e.g., "1984_Summer_Vacation"). Modern scanning software allows you to set a naming convention so that every scan is automatically numbered and dated.
FAQ
Is scanning safer than taking a photo with my smartphone? Yes, significantly. Smartphone lenses often cause "barrel distortion," where the edges of the photo look curved. Additionally, handheld photos struggle with uneven lighting and "keystoning" (where the top of the photo looks wider than the bottom). Overhead scanners use fixed-distance, high-resolution sensors and specialized lighting to ensure the digital copy is a perfect, flat representation of the original.
How much does it cost to digitize a 100-page scrapbook? If you use a service like Photokive, a 100-photo project starts around $59. If each page has multiple photos, you may be charged by the image or by the page. For DIY, after the initial $400-$600 investment for a scanner like the CZUR ET24 Pro, the cost per page is effectively zero, aside from your time.
What resolution should I use for 2026 archival standards? For 2026, 300 DPI remains the baseline for standard viewing. However, with the rise of 4K and 8K displays, scanning at 600 DPI is increasingly recommended for "future-proofing" your collection, especially for photos you might want to display on large digital frames or TV screens.
Conclusion
Digitizing a family scrapbook is more than just a technical task; it is an act of love and preservation. By choosing a non-destructive method—whether through the high-speed efficiency of an overhead scanner or the meticulous care of a white-glove service—you ensure that the context of your family's story remains intact. You aren't just saving a photo; you're saving the handwriting, the ticket stubs, and the very layout that someone once spent hours creating. Don't wait for the adhesive to win the battle—start your preservation project today and bridge the gap between your family's past and its digital future.